So this is the last of my Brunel Workshops for this year; metal fabrication.
So we started off being given our set amount of metal. the metal we are using is called guilding metal, which is a copper(95%) and zinc(5%) alloy. We then set about learning about the workshop and the various machines.
With the tour done done we were taught how to solder the metal together and were each given a go at it ourselves as we would be doing this for our work later. The soldering was very similar to the brazing work I had done earlier (see
this chair). When the joint was made we were encouraged to try and destroy it which if you had done it right you couldn't.
So back to work and the first job was to creat the impression of the oil bowl (try saying that fast 20 times without saying boil) using a large pressing machine.
That done I then began cutting out the parts to my design on the band saw, two long tall pieces with one splayed end each and mm spaced cuts down most of the length and a round flat base. These two pieces I then hit repeadly with a hammer (an actual technique!) to give them an interesting texture. This process did however result in work hardening so to remove this the round piece was annealed by heating it up till it went red to soften it.
The tall side pieces were then put through a metal wringer to curve them, along with the piece that was then soldered to form the part that will hold the tea light.
I then soldered the side pieces and the tea light bit to the base, in their correct positions,
I then began to splay out and model the cut ends of
the side pieces into, well a large natural looking tangle. My idea was
to replicate the sort of natural feel of both trees and the
flames/smoke of fire.
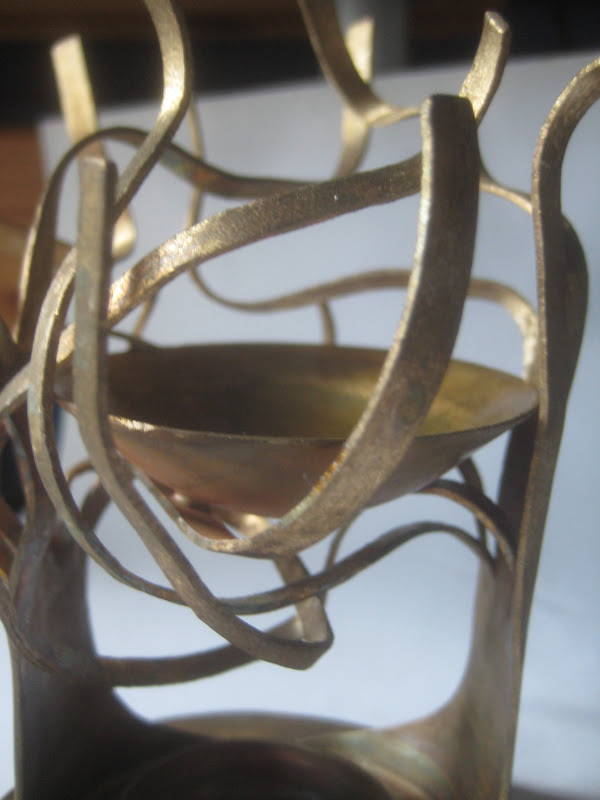
When that was done I took the oil bowl, now cut out and cleaned up and
soldered that in place amongst the tangle of metal. This was quite
tricky as when applying the heat, if it stayed in one point, would
easily melt through the metal, so I had to watch the flame very
carefully.
Once cool it was submerged in an acid bath over night to remove any dirt and discolouration from the soldering and any small rough bits from the cutting. When it was out of the bath I set to work with a dremmel sanding away any rough or sharp edges and any left over discolouration.
The aim of the workshop was to create a highly polished and reflective finish, but with the complexity of my design both me and the technician agreed that was impossible in the alloted time for me. So I got it to as high a standard as I colud in the time.
Overall I am pleased with how it has come out and have put it through a couple of test runs already where the shadows from the....branches(?)....create intesting shapes around it and it works well. So that was the last of the five very enjoyable and satisfying workshops of my first year at Brunel.