Showing posts with label Orthographic Drawing. Show all posts

Tuesday, 8 May 2012

Singapore Experience Design- Rig Day Graphics

So next in our experience project was the Rig Building day which I covered here. But for a report on the day I created some graphics in illustrator.
This is an isometric plan of what we made on the rig building day. To get the perspective right I used the perspective grid tool on illustrator.
This is an orthographic projection of the 'Pod' rig with a top down view at the top, and a front on view to the right. The dotted lines represent the possible paths and locations of the door and folding shelf.
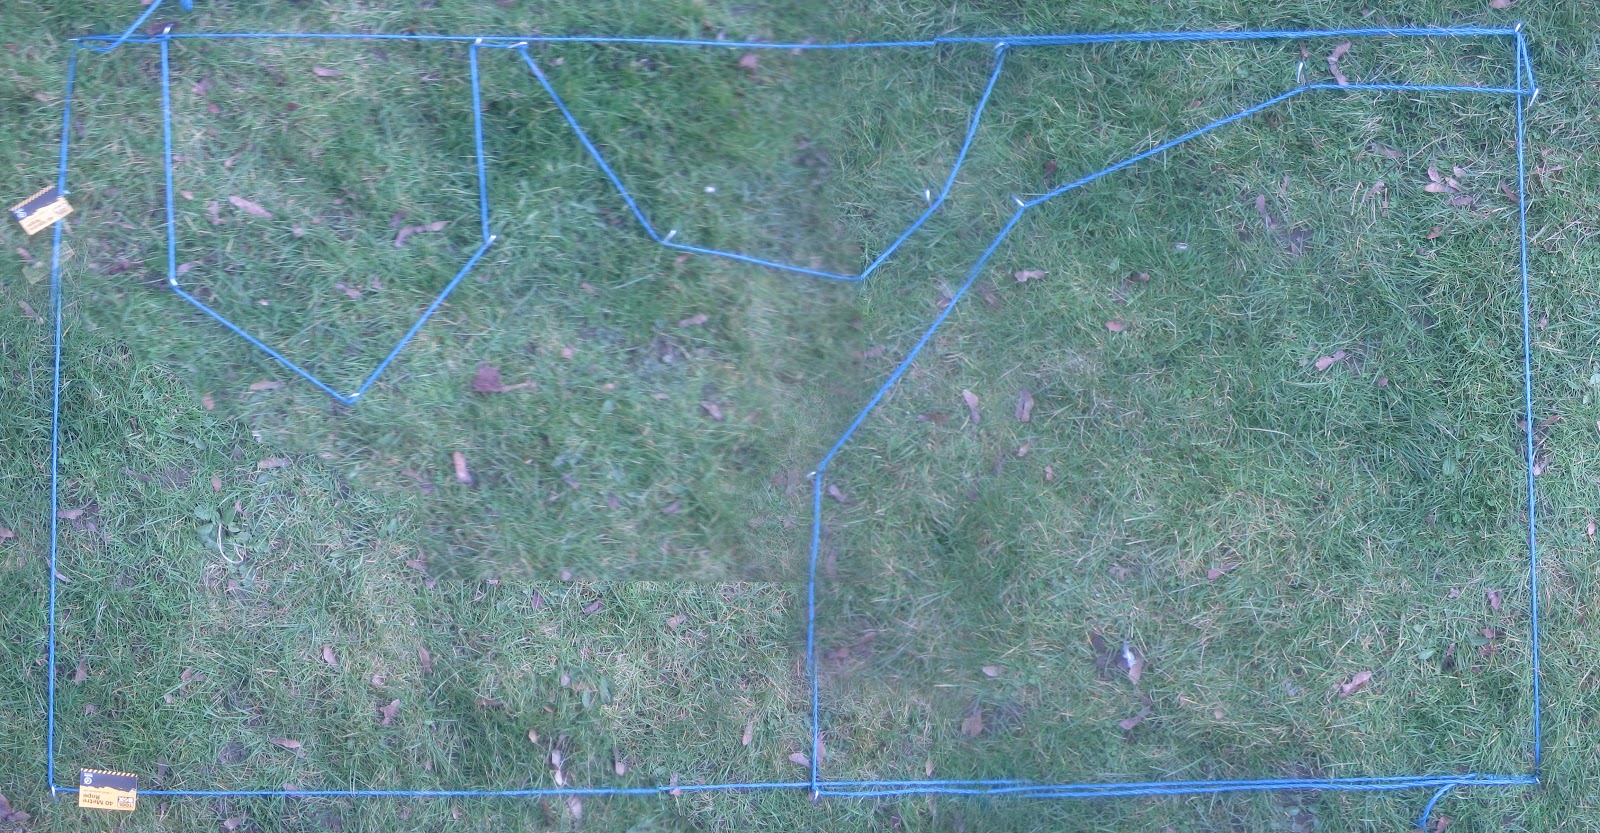
One of the other things we did on the rig day was map out the top floor and the toilet on the grass using rope and tent pegs. These are a pair of quick graphics showing the rope.

Photos of the floor plan with the actual layout(left) and the rope layout(right) highlighted

So that's all the work from the rig day and with that done we began adjusting and finalising the design.

Monday, 27 February 2012

Model Workshop 1

So the second to last of the workshops I am doing this year, model making. This is, like the plastic workshop, only a short workshop, and so it will be finished, one way or another, by Wednesday afternoon. The aim of the workshop is to test our abilities in working with the material and creating a good finish on the model.
So the item I am making is a non-working model of a computer mouse, out of Polyurethane Modelling Board (Uriel) and is a type of very dense plastic foam. At the start of the day were were given the above block which will form the majority of the model.
The first job was, using a pre-drawn orthographic drawing of the model, cut out the main parts of the model, this being the top piece, forming the buttons and the top, and the base. To do this the drawing was stuck to the model and used as a guide on the band saw before cleaning on a disk sander.
With the parts cut out, a layer of wax was applied to the top of the base and a layer of filler to the bottom of the top piece. This creates a perfect fit and neutralises the jagged edges from the cutting (the wax is to stop the filler fixing to the bottom layer).
While the filler was drying I cut out a piece of plastic to go on the bottom of the base to hold the model slightly off the ground. This was cut on a bench saw out of black ABS.
With the filler dry and the excess sanded off, the two pieces now form a perfect fit.
The final stage I got to today was to sand it down to a smooth finish on top, exactly copying the design. This was done first on the disk sander, then with different grade sandpaper from shaping with 120 to finishing with 1200. So at the end of today what I have is effectively a brown version of the Apple Magic mouse as the photos below show.

And finally the photo below is of the area where I was working. As you can see I used lots of sandpaper (getting through 4 sheets of the 120 grade alone) and it was very dusty.
So more work on it tomorrow where hopefully I will get the buttons and clicker wheel made and begin painting it.

Friday, 18 November 2011

Foam Objects Critique

Today was the deadline and critique for the foam objects I have been slowly making over the past four weeks. And it went relatively well, in my opinion at least.
 To recap, the assignment was to create two objects:
  • An everyday object with a historic design style incorporated into the design
  • And a mystery object from a 200 word description from a classmate.
The first object I chose was a mug in the style of the Gugenheim Museum (called deconstructivism). This was quite tricky as it involves lots of flat surfaces flowing into one another with sharp well defined edges, not too easy in foam. Also the whole model had to be cut in half and across the bottom to allow me to remove the inner part of the mug and then glued back together. However I was pleased with the final design and finish on the model, but it could be improved with more time.
 Below are also the drawings I did to come up with and help build the design in some initial ideas and two orthographic drawings.

The second object was done from a description (see it here) my classmate gave me. This is the object I made from that description, Again I am pleased with how it has come out, but it needs more time to be finished properly.

 Again here are a couple of sketches and an orthographic drawing from the description.
 And this here is a photo of the actual object itself, a handheld label maker. So as you can see, not really what I made at all, but the purpose of the exercise was to make what was described, and to that end I think I did quite well.

So to the crit(ique) itself. We each sat at the tables our group's have been allocated (I'm X13) and we got out our models and development drawings. Then as a whole class we gathered around each table in turn and each person presented their models and then Rob (the lecturer) gave his comments and possible improvements for each piece, getting individuals to comment on their own and others work as well in a sort of peer review. 
When it came to my turn Rob agreed with me that the finish could be improved on the mug, but he seemed pleased with the design as it is challenging and also was the only model that was deconstructivism (the others were all Art Deco/Nouveu, Streamlined or Post-Modernism, with a few being Memphis, Natural or Bauhaus). He then suggest it be passed round the class so other students could see it better while he examined my other object. Again he agreed that the finish could be better but other than that he seemed very happy and praised my classmate for picking an interesting and unusual object. There were also some other very good objects such as a Memphis gorilla, a Natural vase and a Streamlined Coke can.

So another pretty good crit and at last a rest from a pretty stressful week so I can now relax and enjoy the weekend!