Showing posts with label Graphic Communication. Show all posts

Saturday, 21 July 2012

Website Project-Planning

My last project from the first year is another graphics project. The brief for this project was to make a simple website using Adobe Flash. Like the previous project this would also be accompanied by a workbook explaining my process and progress.
I started off with a mind map exploring the different areas I would have to explore such as the user interface and any unique flash elements. 


 I then explored some different ideas for the topic of my website such as data flows, visualisations, space and physics(cern), but i settled on the idea below: mountaineering, as I have a fair amount of experience and photos I have taken.
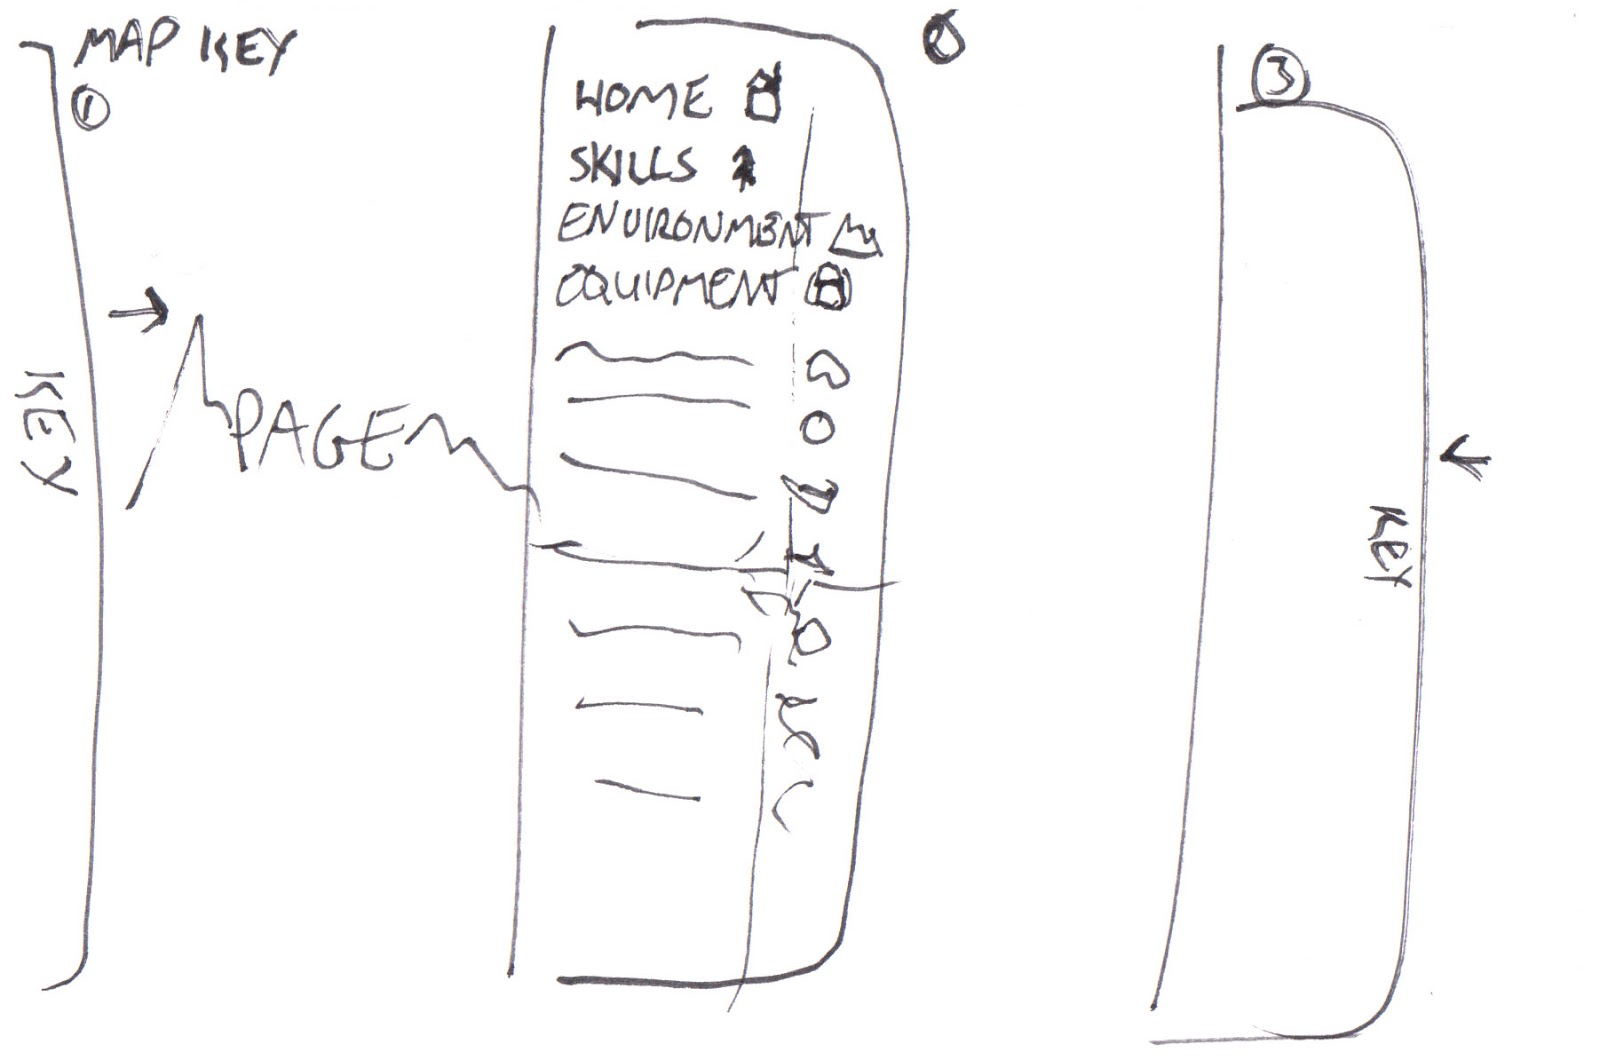
 With the topic chosen I did some sketches to work out how to best display the information and to create an effective navigation system.
 In the end I settled with a mixture of two of the ideas by using a map idea with pictures accessed by a mouse hover over on the peaks.

Finally the last bit of planning was working out how many pages I would need. My first try gave me 52, far too many. I was able to reduce this to just 13, much better.

Next time it will be the practical making of the website.

Tuesday, 24 January 2012

Cocktail Recipies

A little extra feature I wanted to include in my Graphics Workbook, to tie in with the cocktails theme, were recipes at each of the major sections in the book. I realised that to just have the recipes by them selves would look dull, so using the recipes and Google images for reference, i created these illustrations of the drinks to accompany the recipes, the drinks I chose are all considered classic drinks and are:
 Caipirinha,          Daiquiri, Cosmopolitan
Margarita, Martini


Mojito & Pina Colada

These were all placed at the start of each major section, opposite the title of that section. With the drink illustrations I also placed recipes on how to make the cocktails (from the UK Bartenders Guild) beneath each of the cocktails.

Wednesday, 18 January 2012

Final Poster Design

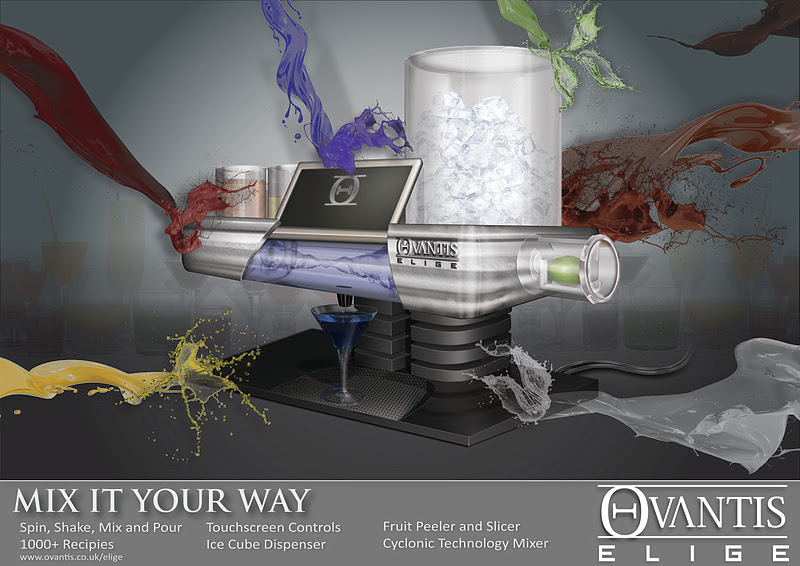
Well I know you've all been waiting for it, (small chance) but here is the final poster design I chose to go with.
The poster uses a number of elements, some more subtle than others. The main elements are obviously the mixer and the splashes of liquid, taken off the Internet, cut out and recoloured. Somewhat more subtly there is a row of drinks in the background, the same as the drinks from the earlier ideas. Then there's finally the text at the bottom and the logo. The tag line was probably the single hardest part of creating this poster (other than the mixer). So anyway, it's all handed in now, so that's a huge load off my shoulders.

Finally, you may know this, or not, but I am now on Twitter @george_thorpe , I'll be using it to tweet anything I find interesting, be it design, science, art, quotes or whatever, so hopefully I'll be seeing you there.

Tuesday, 17 January 2012

Poster Concepts 3

The final lot of poster concepts till I show the one I finally went with, again a mixture of photos and graphics made in Illustrator. These however done in portrait to see how it effected the designs.
Thanks (and apologies) must go to my wonderful model in the first two. Sorry

Monday, 16 January 2012

Poster Cocnepts 2


Some more poster ideas. The top two each use a photo that I took while the bottom two are made almost entirely in Illustrator. Anyway still a few more to come for tomorrow. And just to let you know, the drinks in the top right design: coloured water, though you probably can get drinks in those colours.

Sunday, 15 January 2012

Poster Concepts 1

These are some of the poster ideas I came up with for my Cocktail Maker. They were made in Illustrator which I'm not too good at it so they aren't quite as good as I would have hoped, but they were good for more practice with the program. They are made of a mixture of Internet images, photos and graphics I made, along with the text.

Monday, 9 January 2012

A World of Drink- Infographic

So first day of the second semester over, and we've already been given a new graphics assignment. But anyway more of that later, for now its still full concentration of the first assignment.

If you remember the map of the world made of drinks I made earlier. The idea is for it to be an infographic, and that's what I have now done, with a bit of research.

While making it I realised I would have to make a separate image for Europe as there are so many countries with their own drinks. But anyway now this is done it can go into the workbook along with the other stuff I have done so far. But anyway time passes and deadlines beckon so back to work.

Sunday, 8 January 2012

Cocktail Maker Words

So I'm back at Brunel now, which means there'll be more projects, more work and more posts. So here goes the second term.

Anyway here's a quick graphic I have done for my workbook. it is simply the Cocktail Maker with the image replaced by the names of different cocktails. The names have also been rotated and sheared to group them so they look like the different components. Done in Illustrator which I am getting better at....slowly.

Wednesday, 4 January 2012

Cocktail Maker- Finished

Finally it is done. At last I have completed the artifact part of the Graphics course. My Cocktail Maker is complete, minus a name, and a tagline, and a poster, and a workbook.......so mostly done......ish.

But anyway this is what I have done, and I am very pleased with it. It has taken a long time and it was very difficult to get it to look real, I still don't think it does, but oh well. Below are the main stages that went into the creation of this image.
After a very rough sketch I drew the Isometric (35 degrees) drawing on the left to finalise the design, followed by the more dramatic and eye catching two point perspective drawing on the right.
 That drawing was then scanned and imported into Photoshop where using the pen tool I isolated and created masks for all the different shapes, which took quite a while (100+ screenshots!!)
Then with the masks completed I was able to start importing other images and textures into the image, shaping them with the masks and transform tools and adding highlights and shading. Of course this took the most time requiring 200+ screenshots.

But anyway with that out of the way I can now get on with the poster and the workbook. With that in mind my late night reading today will be: The Visual Quickstart Guide to Illustrator CS5....all of it; better get going.