Showing posts with label Photo. Show all posts

Tuesday, 8 May 2012

Singapore Experience Design- Rig Day Graphics

So next in our experience project was the Rig Building day which I covered here. But for a report on the day I created some graphics in illustrator.
This is an isometric plan of what we made on the rig building day. To get the perspective right I used the perspective grid tool on illustrator.
This is an orthographic projection of the 'Pod' rig with a top down view at the top, and a front on view to the right. The dotted lines represent the possible paths and locations of the door and folding shelf.
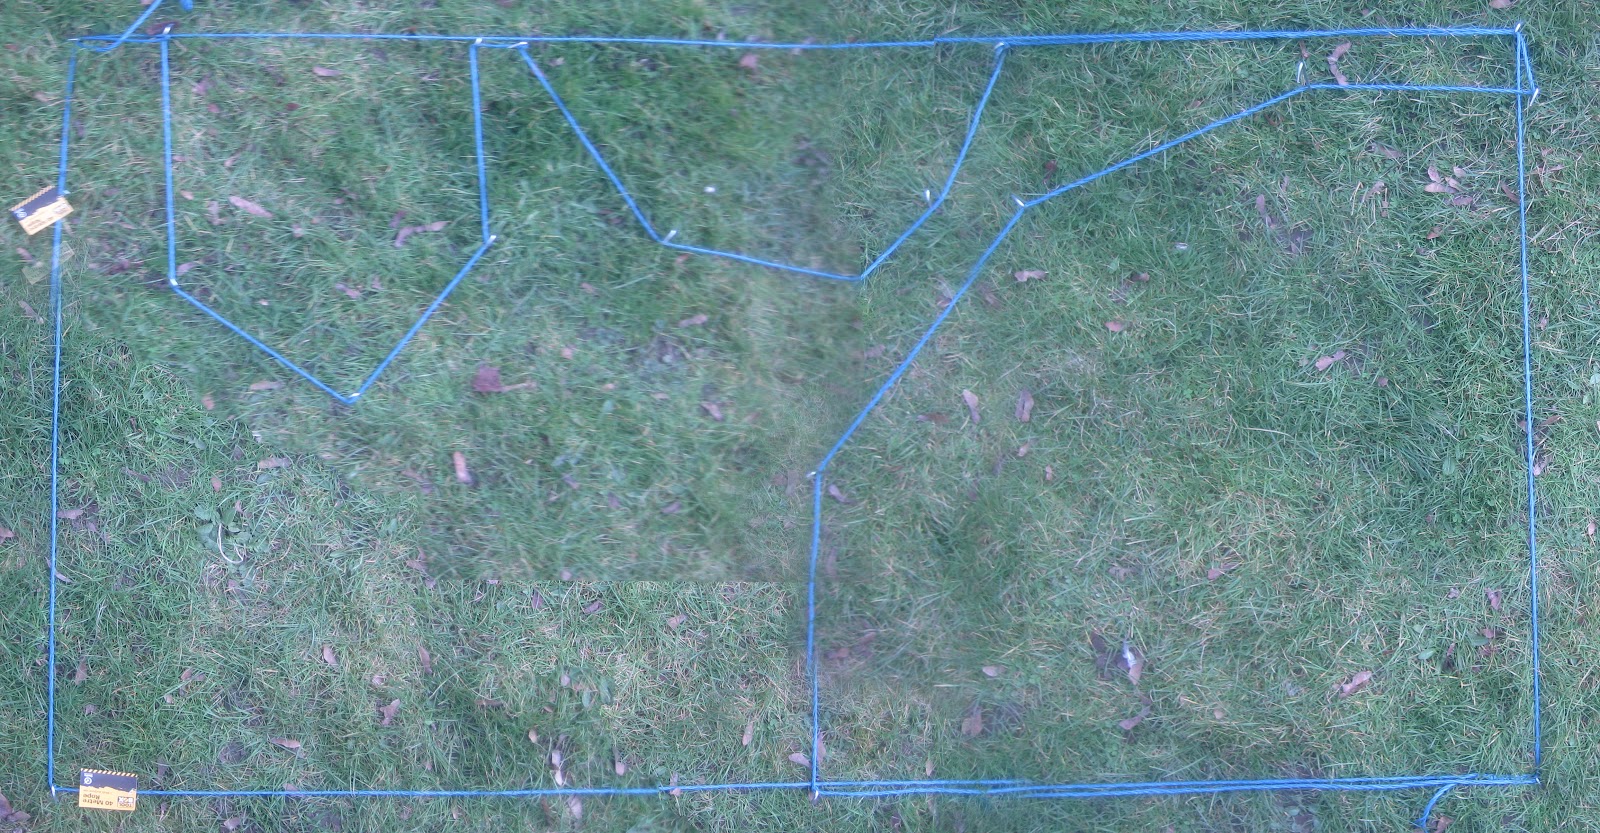
One of the other things we did on the rig day was map out the top floor and the toilet on the grass using rope and tent pegs. These are a pair of quick graphics showing the rope.

Photos of the floor plan with the actual layout(left) and the rope layout(right) highlighted

So that's all the work from the rig day and with that done we began adjusting and finalising the design.

Friday, 27 April 2012

Metal Fabrication Workshop- Incense Burner Construction

So this is the last of my Brunel Workshops for this year; metal fabrication.

So we started off being given our set amount of metal. the metal we are using is called guilding metal, which is a copper(95%) and zinc(5%) alloy. We then set about learning about the workshop and the various machines.
With the tour done done we were taught how to solder the metal together and were each given a go at it ourselves as we would be doing this for our work later. The soldering was very similar to the brazing work I had done earlier (see this chair). When the joint was made we were encouraged to try and destroy it which if you had done it right you couldn't.
So back to work and the first job was to creat the impression of the oil bowl (try saying that fast 20 times without saying boil) using a large pressing machine.
 That done I then began cutting out the parts to my design on the band saw, two long tall pieces with one splayed end each and mm spaced cuts down most of the length and a round flat base. These two pieces I then hit repeadly with a hammer (an actual technique!) to give them an interesting texture. This process did however result in work hardening so to remove this the round piece was annealed by heating it up till it went red to soften it.
The tall side pieces were then put through a metal wringer to curve them, along with the piece that was then soldered to form the part that will hold the tea light.
 I then soldered the side pieces and the tea light bit to the base, in their correct positions,
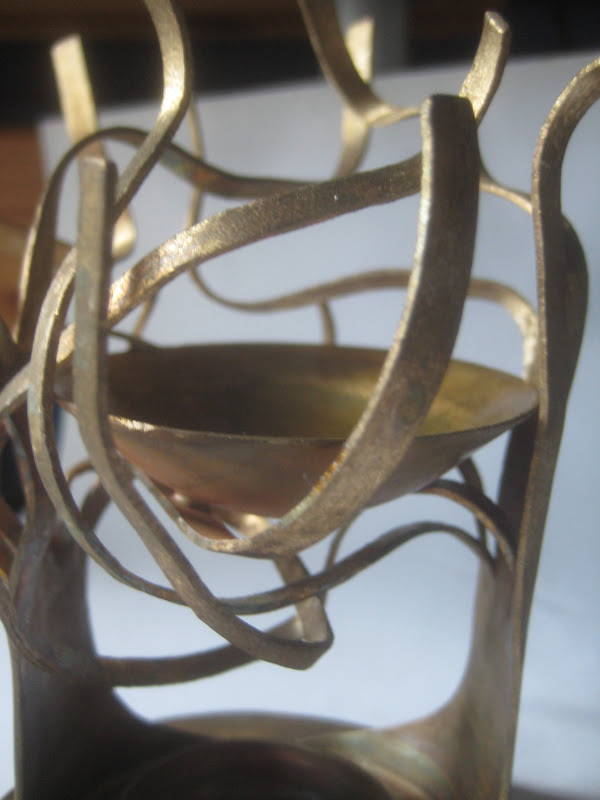
 I then began to splay out and model the cut ends of the side pieces into, well a large natural looking tangle. My idea was to replicate the sort of natural feel of both trees and the flames/smoke of fire.
When that was done I took the oil bowl, now cut out and cleaned up and soldered that in place amongst the tangle of metal. This was quite tricky as when applying the heat, if it stayed in one point, would easily melt through the metal, so I had to watch the flame very carefully.
Once cool it was submerged in an acid bath over night to remove any dirt and discolouration from the soldering and any small rough bits from the cutting. When it was out of the bath I set to work with a dremmel sanding away any rough or sharp edges and any left over discolouration.
 The aim of the workshop was to create a highly polished and reflective finish, but with the complexity of my design both me and the technician agreed that was impossible in the alloted time for me. So I got it to as high a standard as I colud in the time.
Overall I am pleased with how it has come out and have put it through a couple of test runs already where the shadows from the....branches(?)....create intesting shapes around it and it works well. So that was the last of the five very enjoyable and satisfying workshops of my first year at Brunel.

Thursday, 26 April 2012

Metal Fabrication Workshop- Incense Burner Designs

So first my apologies there hasn't been a new post in a month now. In my defence I have been quite busy so there is lots of new material for more posts.


So for my last workshop the aim is to make an Incense Burner out of a brass like copper alloy. We have been told that we are limited in the amount of material we can use to a 100mm2 piece for the oil to sit in and a 200mm2 piece for the rest. With that in mind here are some of the designs I came up with for that brief.
The final design I have chosen to go with is this one below. My aim is to imitate the wavy lines of smoke that come up from burning incense in metal that will support the bowl.
To help me visualise it I attempted a paper model
The model kind of conveys the idea but not particularly well so you'll have to wait to see what it really will look like.

Saturday, 24 March 2012

Rig Building

So its a couple of weeks old, but this is the time lapse video from the Rig Building day I recently did as part of a team for our experience project. The brief of the project, given to us by our first outside clients the charity Building Trust International, is to create accommodation for 8 migrant workers living in Singapore in a 20m2 and 4m high area. as part of answering this brief we built a full size model of one of the components for the design. This was to check the dimensions and possibility of someone sleeping in this component, or 'pod'. Below is a time lapse video I took through out the day showing both the construction and dismantling of the rig.
From the rig, we found that our dimensions were good, if anything too generous so this allowed us to slightly change our design for the better use of the available space. Here are also some pictures taken during the process.
 

Wednesday, 18 January 2012

Final Poster Design

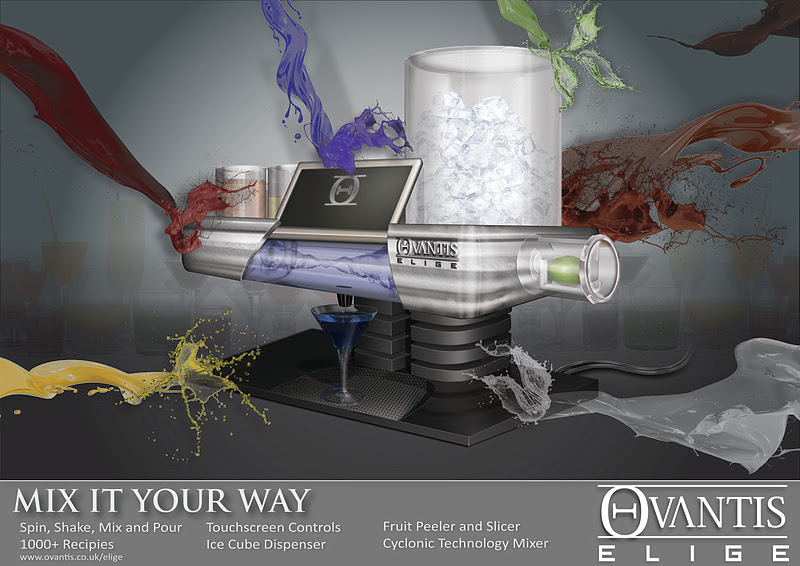
Well I know you've all been waiting for it, (small chance) but here is the final poster design I chose to go with.
The poster uses a number of elements, some more subtle than others. The main elements are obviously the mixer and the splashes of liquid, taken off the Internet, cut out and recoloured. Somewhat more subtly there is a row of drinks in the background, the same as the drinks from the earlier ideas. Then there's finally the text at the bottom and the logo. The tag line was probably the single hardest part of creating this poster (other than the mixer). So anyway, it's all handed in now, so that's a huge load off my shoulders.

Finally, you may know this, or not, but I am now on Twitter @george_thorpe , I'll be using it to tweet anything I find interesting, be it design, science, art, quotes or whatever, so hopefully I'll be seeing you there.

Tuesday, 17 January 2012

Poster Concepts 3

The final lot of poster concepts till I show the one I finally went with, again a mixture of photos and graphics made in Illustrator. These however done in portrait to see how it effected the designs.
Thanks (and apologies) must go to my wonderful model in the first two. Sorry

Monday, 16 January 2012

Poster Cocnepts 2


Some more poster ideas. The top two each use a photo that I took while the bottom two are made almost entirely in Illustrator. Anyway still a few more to come for tomorrow. And just to let you know, the drinks in the top right design: coloured water, though you probably can get drinks in those colours.

Friday, 16 December 2011

Wood Workshop- Finished

So the wood workshop is now finished and I have a lovely table, box for my trammel and a pair of joints (not pictured).
Last we saw the trammel box it was finished but looked somewhat like this. So now it is fully constructed and finished. I chose to varnish it and not polish it as I prefer the satin look to the glossy look from the polish.
The lid on the top, made of veneered MDF, slides open to the left to reveal...

The Trammel inside. The orange tray is simply some HIPS vacuum formed around a premade mould to hold the trammel in it's various parts. I chose orange, partly because it was between that, red or yellow, but also because it compliments the gold of the brass and the paleness of the beech. I may change it when I get round to the plastic workshop, as it isn't cut perfectly and I will have a greater choice of colour, but for now it is fine. I am particularly glad this is made as I now have a place to store the trammel, which was just sitting on my shelf.

Of course the other piece I made in the workshop was the coffee table. Last time the table was still in two pieces with the legs gluing in pairs but the two pairs of legs were glued together with the remaining two side pieces.
That done I began work on my table top. I you remember the top was designed as such with a bullet like hole in the top. I have suck with this idea. However because I had more time that I reasoned it would take to create the hole, I decided to first create a basic inlay in the form of the border of Mahogany.
This proved to be anything but simple, but in the end I got it done to a quality I was happy with. I then consulted with one of the technicians on how best to create the crack, and we decide that I should first use a Forsner bit to create the hole and then use a large Heckler saw to cut out the cracks. However another technician, while being asked about the plausibility of making the cuts, kindly agreed to cut it himself, as the thick oak would need an experienced and very steady hand to guide the wood. So the next morning I collected my perfectly cut wood, and set about sanding it down, using a Bobbin Sander to create the jagged edges of the hole and then painted the inside in black paint before varnishing it.
 Once it was dry and the legs were dry as well, I used some screws to fix the top in place finishing off the table, and with only 10minutes before the deadline just in time too.

I am really pleased with how it has come out and now that I have had my last lecture of 2011, I can take it home with me tomorrow! So just a quick thanks for all of you who have stoically endured this through my first term at Brunel and I'll be back at Brunel in January, but even though it is now the holidays I still have a lot of work to do so I will keep posting, though I may take a break for Christmas:)