
Showing posts with label Pencil. Show all posts
Showing posts with label Pencil. Show all posts
Sunday, 11 March 2012
Outdoor Sketch

Friday, 9 December 2011
Cocktail Maker- Mixing Sketching and Photoshop
A couple more concepts for Graphics, to help flesh out the workbook. These are two designs where I show a couple of the quick ways I can render concepts. I started both designs with a simple pencil and pen isometric drawing.
 Then I added marker rendering to the sketch adding tone and texture to help define both its colour form and material.
 Then finally I used the original drawing in Photoshop to create this colour render of the the product.

The second design was done in exactly the same way as the one above. To quicken the Photoshop stage I used my graphics tablet as I am quicker and more comfortable with it than with either the mouse of touchpad.


The second design was done in exactly the same way as the one above. To quicken the Photoshop stage I used my graphics tablet as I am quicker and more comfortable with it than with either the mouse of touchpad.


Friday, 11 November 2011
Product Description 2- Partner's Product; & Remembrance
So after a day full of lectures yesterday, the only change being a switch in Mechanics from Statics to Dynamics, today I got on with the second part of the Design Process assignment, making a model of a product, purely from a description by my partner. The description, given to me earlier goes like this:
From this description I was able to create this rough sketch of how it may look. This is only rough as it gives me a starting point for the actual construction of the model out of the pink foam.
From this sketch, and with the description close to hand, I was able to start work on the model in the foam workshop today.


The product which I am describing centres around a flat disk which has teeth around the outside set at a distance apart of about 5mm. The disk rotates and has a diameter of the 80mm. Beneath the disk is a moulded plastic component which is designed to support the disk and form a handle to the product. The handle has a very basic ergonomic shape which fits the hand in a pistol type grip with a big trigger component designed for all four fingers. Where the palm rests there’s a section which opens up allowing the product to be reloaded.
Above the rotating ring there is a 25mm width raised 5mm section which acts to stop the ring coming off from the top. It runs in the same direction as the pistol grip directly above it and at the end there is a rectangular hole (4mm x 11mm) where the product produces its completed product.
Surrounding the ring there are a series of letters and symbols all with different processes. Beneath the rotating ring there is also a small button which sticks out 5mm with a diameter of 4mm.
The product is entirely plastic external components in very basic primary colours.
From this description I was able to create this rough sketch of how it may look. This is only rough as it gives me a starting point for the actual construction of the model out of the pink foam.

At this stage I am unsure of exactly what it's function is, I have a guess that it is an old tool for making raised labels, but I could not say for certain.
From this sketch, and with the description close to hand, I was able to start work on the model in the foam workshop today.

As I hope you can see, I got the major shapes blocked out and roughly sanded into shape using both the hot wire cutter and some 60 grade sandpaper. During the next week I will focus on the details of the model, and sand down the surface to a high quality finish, the same as needs to be done with the other part of this assignment, the mug. Some more photos of the work are below.


Of course I cannot finish this post today without a reference to the fact that it is Remembrance Day. As a person I believe it is my obligation to improve the world, and as a designer I am well placed to do that. But we cannot do that without remembering the tragedy of the sacrifices of those who have fought and fallen to enable everyone to have an equal opportunity to improve the world, no matter how small that improvement may be. So I will remember and reflect on all those who have fought, and their families, who must live with their worries, concerns and losses, today and everyday, and I hope you will too. Thank you.

Wednesday, 2 November 2011
Quad Bike Sketches
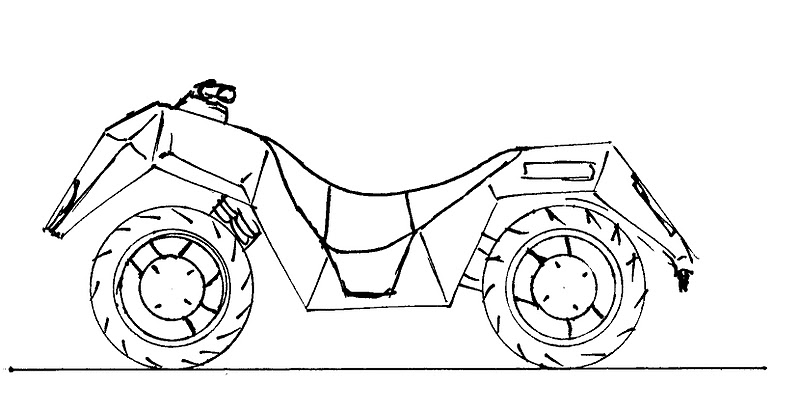
Quadbikes, lots of quadbikes. So these are some of the development sketches for my Graphic Communication project. I chose a quadbike as I hope to be challenged by the complexity of it, wanted to to a vehicle of some sort (without the awkwardness of doing a car) and I like quadbikes. The sketches below are some side on views first of all.


 After those I have done some three quarter view sketches in ink, exploring more ideas and forms.


 Finally I did a few sketches starting with markers to establish the vague forms before using the fineliner to establish some details.

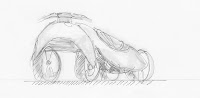
 So yep, eventually I'll have to make this look life like in photoshop, should be fun, and a good challenge.




Thursday, 6 October 2011
The Last Box and Cylinder Renders/sketches
So I've finally finished all the sketches and renders due for tomorrow, did the last one tonight. Instead of just doing renders however I've also done two pages of pencil sketches and two of just ink along with the last two renders. Also sorry if you can't see the first two they are done in pencil and the scanner isn't very good at picking up the contrast, so if you really want to see them you can angle the screen to increase the contrast. The pictures are:


A cardboard box, digital camera, a bottle of contact lens solution, a pot of pads and a moleskine.

An Oxo box, my wallet, a bottle of Fairy, a polythene box and a jar of peanut butter.

The stages of a compact set of scales.

The stages of using a hand pumped slicer.

A digital tablet pen.

A USB Stick.
So I get to hand them in tomorrow and get more work in return yippy.
Wednesday, 5 October 2011
Not Hole Punch Hole Punches
Today was a free day so no lectures, so I was able to get lots of work done.
In Mechanics I was given this brief:


In Mechanics I was given this brief:
- Design a device for making two 6mm holes 80mm apart and 10mm from the edge of a sheet of paper


So there we are, hole punches that aren't hole punches..... sigh.... what next?
Sunday, 2 October 2011
More Box and Cylinder Renders
Here are some more renderings of Box shapes and cylinder shapes. Each was rendered the same way as before. These were done today, instead of my original plan which was to go into London to the Design Museum, but frustratingly all the train from Uxbridge were cancelled due to works. I may end up going on Wednesday, when I have a free day, have to see how things go. So anyway, some more renders, and only 10 more to go....


Tin Can

A small portable speaker

A 3rd gen Ipod Nano

A tube of shaving cream

and a shampoo bottle.
Saturday, 1 October 2011
Cheese Grater
So remember that amazing talk I was going to be given at the end of the last post? Well it didn't happen, the lecture theatre was double booked. So instead we had a lecture from next week, which was an introduction to the module Design Processes. As a part of this came one of the first small assignments, 8 A3 pages of drawings of box and cylinder based objects, the first of which is below.
 As you should hopefully be able to tell it is a cheese grater. In real life it is drawn to a scale of 3:5. It was first done in pencil, with lots of construction lines. Then using a black fine liner I went over the correct lines, then cool grey markers and finally highlights with some white acrylic ink.


This is the actual item.
So there we go 1 down, 16 to go? sigh...
Thursday, 29 September 2011
My Design Process
So there hasn't been much creative work lately, its all been lectures and tutorials, today was electronics, maths and mechanics. But for the lecture tomorrow I have had to, on an A3 paper, illustrate my design process.

This is based mainly on what I did for AS and A2 D.T but is a good representation of what I would do naturally. So this is all for tomorrow when I will have a lecture from a very good speaker,and the head coordinator of the course, Paul Turnock, which everyone is looking forward to.

This is based mainly on what I did for AS and A2 D.T but is a good representation of what I would do naturally. So this is all for tomorrow when I will have a lecture from a very good speaker,and the head coordinator of the course, Paul Turnock, which everyone is looking forward to.
Subscribe to:
Posts (Atom)